Showing posts with label Baking. Show all posts

November 29, 2012

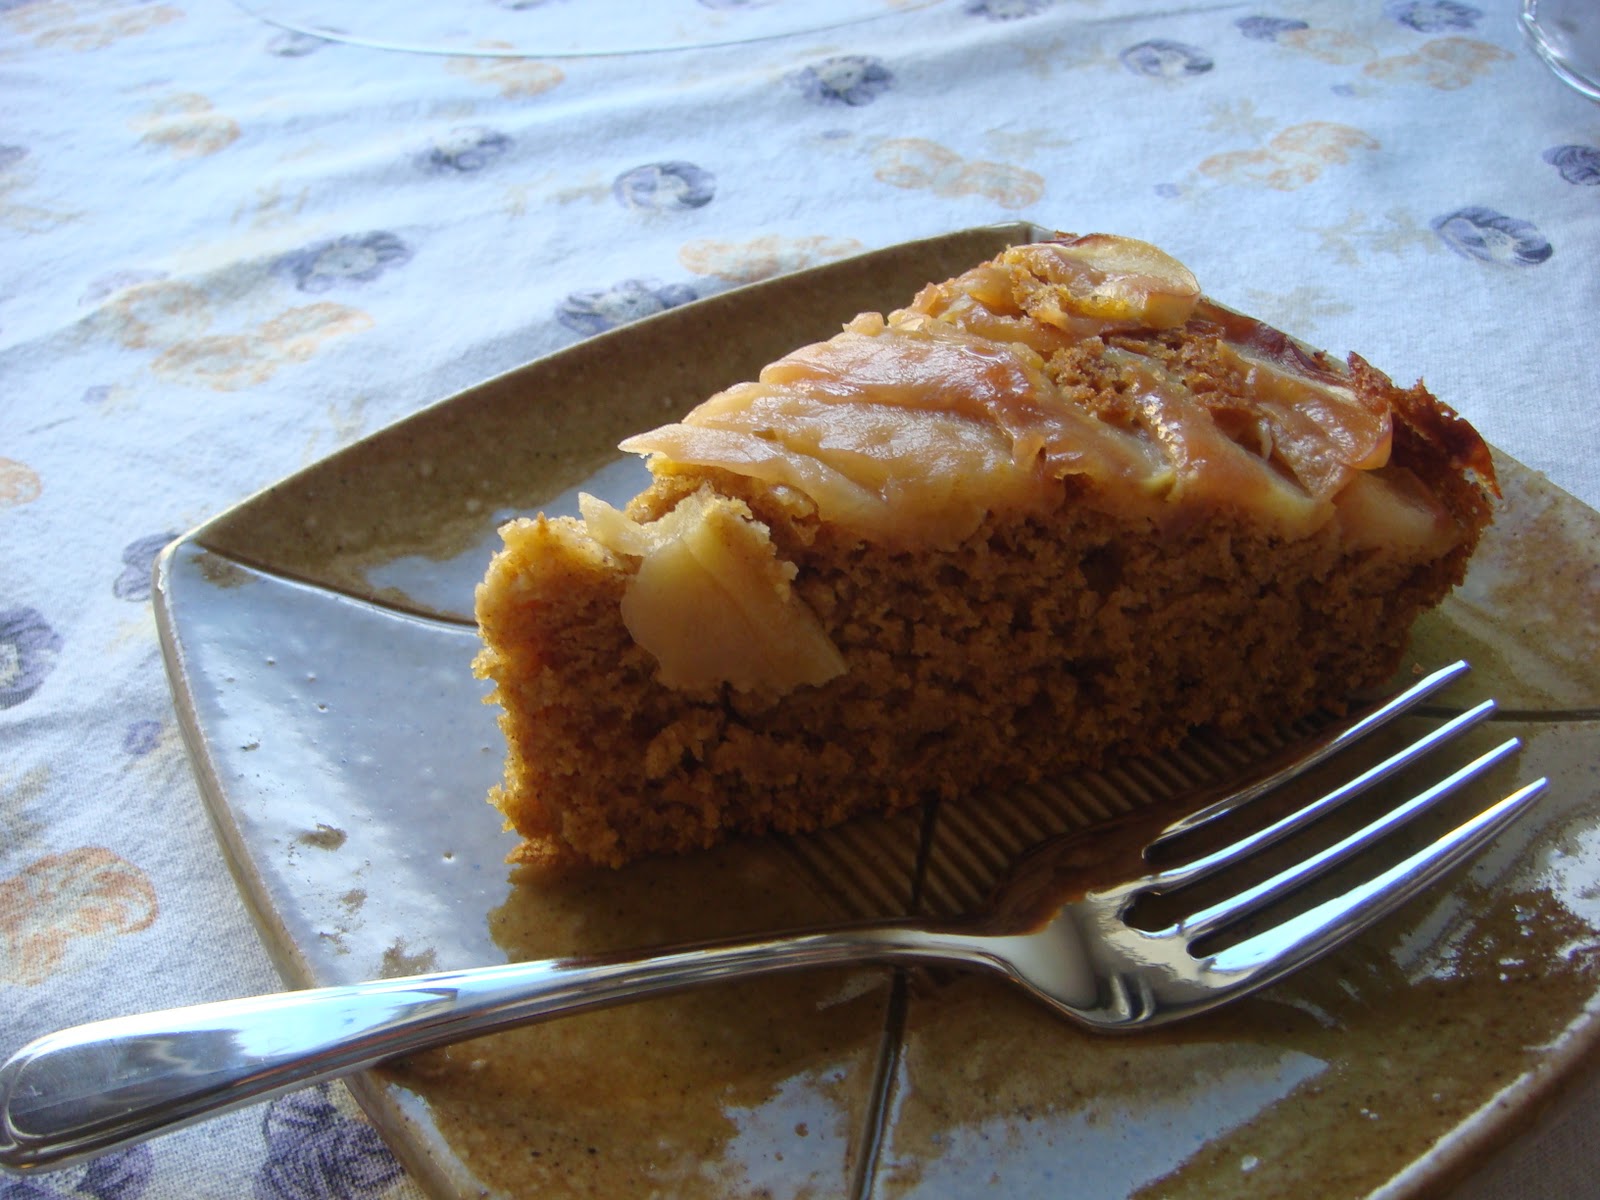
Gluten-free apple spice cake for six months

DSC05334

Lucie turned six months old the other day. And we held a little party.

Why not celebrate six months? It seems like a pretty big accomplishment to us. Recently, I was talking to my sister, whose baby boy is 4 and a half months, and we both said we used to wonder why parents held parties for little kids. What’s the point? we thought. Like the kid cares. It’s all for the parents.

Now we get it. Exactly! It is all for the parents. And the parents need those parties. It’s a way to say, “Look! We made it! You are six months old and you are still alive and healthy and happy!”

November 15, 2012

Gluten-free Nova Scotia oatcakes

DSC05297

Growing up in Halifax, Nova Scotia, oatcakes were a coffee shop staple. A cross between a cookie and a biscuit, they were the size of pucks and nearly an inch thick, and sometimes dipped in chocolate. I remember often buying them and almost always being disappointed – they were usually far too sweet and far too dry, with a texture reminiscent of sawdust. But somehow I couldn’t stop giving in to the oatcake temptation.

I was reminded of oatcakes a couple of years ago when talking to a colleague who worked in Nova Scotia for a while. During that conversation I realized for the first time how regional the oatcake is. I had never thought about the fact that I didn’t really see them anywhere but in Nova Scotia.

August 6, 2012

A summer feast and a gluten-free cookie

2012-08-04 18.52.092012-08-04 17.27.272012-08-04 18.25.412012-08-04 18.51.442012-08-04 20.28.432012-08-04 20.28.33

The other night, Jacques and I invited our friend Bethany over for a meal celebrating summer. It was really fantastic. Jacques chose all of the recipes from the great cookbook I bought him last Christmas – Around My French Table by Dorie Greenspan. This book is a keeper. Everything we’ve made from it so far is really wonderful.

We went to the farmers’ market in the morning to collect our ingredients for the meal – eggs, bacon, green beans, tomatoes, rhubarb, and a delicious rhubarb wine. This time of year at the market is magical – the stands are overflowing with an abundance of beautiful vegetables and fruit. I particularly can’t resist buying a ton of fruit. This week we brought home peaches, cherries and little golden plums that we are enjoying. So far I’ve turned some of them into smoothies and popsicles.

We cooked four courses. The appetizer was a chickpea flour flatbread from Nice called Socca, and the main course was a deconstructed BLT salad with hard-boiled eggs. We did a cheese course of cheesy creme brulee with green beans, and dessert (which I forgot to photograph) was a salted buttery shortbread with roasted rhubarb.

Thinking back on this meal, I wish I could eat everything all over again. It was sublime. I think our favourite was the salad, which was outstanding. Arugula, crispy bacon, homemade croutons, juicy cherry tomatoes, topped with hard-boiled eggs, those topped with dollops of homemade mayonnaise. The blend of flavours and textures all came together into bitefuls of fresh summer flavour. Making your own mayonnaise makes all the difference. It is so, so good, and so easy.

The cheesy creme brulee is ingenious, salty and delicious, and also very easy to make. And I was stunned by how amazing the roasted rhubarb was. It breaks down into s silky tangle of tangy but sweet fruit. I think I’ll be roasting rhubarb lots more from now on.

The cookies is called a salted butter break-up, and it’s basically a large shortbread cookie that you bake in one piece and then take to the table for people to break off their own hunks. It has French grey salt in it, which gives a wonderful granular crunch of salt along with the sweetness. It easily converted to gluten-free, which was wonderful. You can see my recipe below.

None of the food on this menu screams “French” to me, except maybe the creme brulee. That’s the great thing about this cookbook. The recipes are incredibly diverse and mostly uncomplicated, including a delicious Vietnamese chicken soup and a fantastically rich cauliflower bacon gratin. And Dorie Greenspan is an exacting recipe writer, giving you precise instructions, telling you what you can make in advance, and including lots of variations on each recipe. There are so many more we’d like to try.

Lucie hung out with us on the balcony in her bouncy chair and on her activity mat, enjoying the fresh air. So far she is proving to be very amenable to most of our plans, and she is a great sleeper. Now that there is a baby in our lives, I’m sure we’ll be spending even more time at home cooking, and inviting friends over to share the meal.

Gluten-free Salted Butter Break-Ups
Adapted from Dorie Greenspan’s Around My French Table

Dorie tells us this recipe is traditional in the Poitou region of France, where butter is prized. If you can’t find sel gris (grey salt), which is slightly moist, grey salt, you can use another coarse salt. We bought a bag of sel gris at the Italian Centre, and it was delicious in these cookies.

127 g/4.5 oz tapioca starch
42 g/1.5 oz sweet rice flour
42 g/1.5 oz sorghum flour
3/4 – 1 tsp. sel gris
127 g/4.5 oz cold unsalted butter, cut into 18 pieces
3 to 5 tablespoons cold water
1 egg yolk, for the glaze

Mix together the starch and the flours and the salt in a medium bowl. Add the butter, and cut it into the flours using a pastry cutter. The mixture should end up looking like coarse meal, with some pea-sized chunks of butter and some smaller flakes. Add the water one tablespoon at a time and mix together with a wooden spoon. After a few tablespoons, start mixing with your hands so you can feel when the dough starts to come together. It should be fairly sticky and malleable, and almost form a ball.

Scrape the dough onto a work surface, form it into a square, and pat it down. Wrap the dough in a large square of plastic wrap and chill in the refrigerator for at least one hour. Dorie tells us the dough can be refrigerated for three days or frozen for two months.

When you’re ready to bake, centre a rack in the oven and preheat it to 350. Line a baking sheet with a silicone baking mat or parchment paper.

Remove the dough from the fridge, and, if it’s very hard, bash it a few times with your rolling pin to soften it. Put the dough between sheets of plastic wrap or waxed paper and roll it out to about a 1/4 inch thickness, about 5 by 11 inches. It doesn’t have to be an exact rectangle. Transfer the dough to the baking sheet.

Beat the egg yolk with a few drops of cold water and, using a pastry brush, paint the top of the dough with the egg glaze. Dorie’s recipe asks you to then score the dough in a crosshatch pattern. I tried this, but it doesn’t seem to stay scored in the oven with the GF dough, and doesn’t look great when it comes out, so I wouldn’t bother.

Bake the cookie for 30 to 40 minutes. In our oven, 35 minutes was perfect. It should be golden and firm to the touch, but have a little spring when pressed in the centre. Transfer the baking sheet to a rack and allow the cookie to cool to room temperature.

Serve whole and allow your guests to break pieces off. It will be messy but fun!

February 4, 2012

Gluten-free spice cake

DSC03250

Lately I’m making this great little spice cake a lot around here. It really resembles a quick bread more than a cake. I think of it as a snack rather than a dessert, though it’s sweet enough to round off a winter meal nicely too. Though I haven’t tried this (since we still don’t own a toaster after chucking our gluten-filled one ages ago), a slice of this cake would probably be great lightly toasted with a smear of butter and a drizzle of honey to jazz it up.

I like it plain and simple, packed in my lunch at work or just eaten around the house when I’m craving something small and tasty, but also nutritious. J is a big fan of it too, which always counts for a lot in my book. I don’t really enjoy making things if he doesn’t want to eat them too.

DSC03243DSC03245DSC03254

The recipe is very adaptable, and I really like the fact that it includes some fruit or vegetable to make it all the more healthful. It’s very easy to throw together, and I usually have all the ingredients on hand. But the most convincing argument to make this cake is that it’s so tasty. It’s moist with a deep flavour thanks to the spices, and I really like the crunchiness of the nuts throughout. The texture is also beautiful: tender but not too crumbly. It doesn’t fall apart as soon as you slice it, but stays together firmly.  I know this is a cliché, but this is one of those baked goods that no one would ever guess is gluten-free.  

DSC03253

After months of procrastinating, I finally did up our new household budget for the next three months. It’s a bit sobering, but also really nice to know exactly where all of our money is going. I’m definitely on a tighter grocery budget than I was before, which means I’m trying to be really creative with the cheapest, yet most wholesome ingredients possible.

Making rather than buying gluten-free snacks is a big part of this. Not only is it cheaper, but they usually taste better, and you know exactly what’s in them. My goal is to start regularly making bread and crackers so we don’t have to buy them anymore. I’ve starting experimenting with homemade crackers, and I think I’ve figured out the perfect recipe. It might need a few more little tweaks, but I promise to share it here soon.

As for sweet baked treats, they’re something I also like to have on hand as often as I can. For that reason I try not to make them too decadent, so we don’t have to feel guilty eating them. I always bake with whole grains and I often use less sugar than a recipe calls for.

This spice cake is based on a recipe from one of my favourite blogs – 101 cookbooks. It’s always a good place to go if you’re looking for cooking inspiration. I really appreciate that Heidi includes weights in her baking recipes, which makes them much easier to convert to gluten-free. This cake converted beautifully, as most quick breads do.

A few notes about the recipe: I used the gluten-free flours listed below because it’s what I had on hand. Feel free to experiment or use your favourite mix. To get the most consistent results, use a scale to make sure you keep the same total weight of flours I used. I prefer a ratio of about 70 percent whole grain flours to 30 percent starches, but it’s up to you.

If you don’t have any garam masala, don’t let it deter you from trying this. This Indian spice blend is usually a mixture of black pepper, cloves, cumin seeds, and cardamom seeds, so you could try it with a bit of each. Maybe not too heavy on the cumin. I ran out of both cinnamon and garam masala the last time I made this, so along with what I had left of those spices, I added some ginger, allspice and cardamom. Still awesome.

And finally, I’ve baked the cake with bananas and sweet potato with delicious results. I haven’t tried it with squash yet, though that’s what the original recipe calls for so I’m sure it would be great too. Depending on how sweet you want it, you could add a little more sugar if you’re using squash since it’s generally not as sweet as bananas or sweet potato.

DSC03252

Gluten-free Spice Cake
adapted from this recipe

1/4 cup / 35 g brown rice flour
1/2 cup / 60 g sorghum flour
3 Tbsp / 25 g millet flour
1/4 cup / 28 g tapioca starch
2.5 Tbsp / 22 g sweet rice flour 
1 teaspoon baking soda
3/4 teaspoon ground cinnamon
1 teaspoon garam masala
1/2 teaspoon salt

1/2 cup  packed + 1 Tbsp. / 115 g brown sugar
2 large eggs
1/2 cup / 130 g ripe mashed bananas, cooked mashed sweet potato, or roasted pureed winter squash
1/4 cup / 60 ml milk or water
1/2 cup / 115 g vegetable oil or melted butter
1/3 cup / 30 g chopped almonds or walnuts

Preheat the oven to 350 degrees. Butter and flour a loaf pan that’s about 9x5x3 inches. (As you can see in the photos above, I’ve used two sizes of loaf pan and they both work fine.)

Whisk together the dry ingredients in a medium-sized bowl. In a separate bowl, mix together the brown sugar, eggs, banana or sweet potato or squash, milk or water, and oil until blended.

Add the wet ingredients to the dry and fold together until there are no floury patches. Mix in most of the nuts. Pour the batter into the pan and sprinkle the rest of the nuts on top.

Bake the cake for 50 to 60 minutes, until the edges have browned and the centre of the cake is set. You can test for doneness using a skewer or toothpick inserted into the middle – it should come out clean.

This cake keeps well on the counter for a few days, wrapped in plastic wrap or stored in an air-tight container. 

December 3, 2011

Gluten-free Christmas Cookies & Some News

DSC02970 
The Christmas baking started a couple of weeks ago around here. A little early, yes, but I had an excuse: I attended a cookie exchange for my friend Mackenzie's wedding shower. It was a great excuse to make up a big batch of dough for the holiday season. There's still some in the freezer for the coming weeks.

The wedding shower was great. Unfortunately I couldn't eat most of the tasty-looking treats, but since neither the host nor I can eat gluten, her mother brought a few gluten-free chocolatey things from the Old Strathcona Farmers' Market which were delicious.

DSC02973

The cookies I made are my first attempt at converting a favourite Christmas recipe, and they were a huge success. . J and I first made Nigella Lawson's Christmas Decoration Cookies five years ago (!) when we were living in our first apartment together in Charlottetown, the site of the original little red kitchen. We've loved them ever since. I think it's the unexpected spiciness from the black pepper, and the use of brown instead of white sugar. It turns them into a cross between sugar cookies and gingerbread cookies. They adapted perfectly well to my whole-grain gluten-free flour blend, without any xantham gum or guar gum. The dough was easy to work with and the taste was just what I remembered.

DSC02979 
The icing is a nice way to dress up these cookies, but I'm not sure it's entirely necessary. I think the spicy flavour comes through better without it.

DSC02964 
(We don't usually make these to hang on the tree anymore - we'd rather eat them fresh. But they do look lovely if you want to turn them into decorations.)

J and I are getting pretty excited about Christmas. We're staying here in Edmonton, and it's the first year that neither of our families will be coming to visit us. A different, quieter Christmas, but I think it's a good thing. From here on out Christmas will probably be crazy, since there will be an added element.

DSC02965 
Yes, this is our last Christmas just the two of us. By next year we'll have a seven-month old for everyone to spoil and enjoy. We're expecting our first baby on May 25. Needless to say, we're pretty pumped about it!

And that's the main reason the blog has been so quiet over the past few months. I haven't been feeling so  great - lots of nausea and fatigue. It's been an adjustment, and blogging is not a big priority. But having rounded the three-month mark a few weeks ago, I'm hoping that more energy lies ahead. We'll see how it goes.

DSC02972 
Enjoy these cookies and the start of your holiday season! These days I'm really enjoying candlelight in the evenings and looking at the sparkly coloured lights on the legislature grounds outside our window. Here's to lighting up the Edmonton darkness however you can.

Gluten-free Pepper-Spiced Christmas Roll-out Cookies
adapted from Nigella Lawson’s Christmas Decoration Cookies

Ingredients
For the cookies:

3 1/2 ounces (100 grams) unsalted butter, softened
3 1/2 ounces (100 grams) dark brown sugar
10 1/2 ounces (300 grams) Gluten-free All-purpose flour mix, plus extra for dusting (I used this one)
Pinch salt
1 teaspoon baking powder
1 teaspoon ground cinnamon
1/4 teaspoon ground cloves
1 to 2 teaspoons freshly ground black pepper (I like it with 2 teaspoons)
2 large free-range eggs, beaten
4 tablespoons clear honey

For the icing and trimmings:
2 ½ cups icing sugar, sifted
6 tablespoons water
Gold or silver sugar balls or sprinkles
Ribbon or wire, for hanging

Directions:
Preheat oven to 325 degrees F (170 degrees C).

Place the butter and sugar in a clean bowl and beat with an electric mixer until the color and texture of the mixture becomes pale. Place the mixture into the bowl of a food processor* and add the flour, salt, baking powder, cinnamon, cloves and freshly ground black pepper. Blend the mixture. While the food processor is blending, gradually pour the eggs and honey down the funnel of the food processor's lid into the bowl until a dough has formed (you may not require all of the liquid if the dough has come together before it is used up). If the dough is too dry add a little water to the mixture. If the dough is too wet add a little flour.

*If you don’t have a food processor – blend the dry ingredients in a large bowl, then add the butter and sugar mixture and beat with the electric mixer until it is a sandy texture. Then gradually add the egg and honey while the beaters are still on until the dough comes together. Stop and test after you’ve added about two-thirds of the liquid to see if you can squeeze the dough together into a ball. If not, continue to add liquid until you can.

Halve the dough. Wrap one half of the dough in plastic wrap, place it in a freezer bag, and refrigerate. Place the other half of the dough onto a floured work surface. Roll the dough, with a rolling pin, into a disk to about 1/4-inch thick. Using cookies cutters, cut decoration shapes out of the dough. Re-roll the remaining dough and cut out more shapes until the dough is used up. Remove the second half of the dough from the fridge and repeat this process.

If you want to hang your cookies on the Christmas tree: with the pointed end of a small icing nozzle, puncture a hole just below the top of each decoration (through which ribbon or wire can later be threaded to hang them).

Arrange the decorations on baking sheets lined with a layer of reusable silicon baking parchment and cook for 15-20 minutes or until they are cooked through and golden-brown in color. Transfer the decorations to a wire rack to cool.

To make the icing, mix approximately six tablespoons of boiling water with the sifted icing sugar and stir until you’ve got a thin, glossy glaze. Ice the cold decorations using a teaspoon (use the tip of the spoon for dripping the icing onto the decoration and the back of the teaspoon for smoothing). Scatter sprinkles or gold and silver balls as you desire. Cut the ribbon into short lengths and thread the ribbon through the holes in the decorations.

October 20, 2011

Pumpkin apple upside-down cake–again

DSC00487

In my last post, I forgot to include the link to the recipe for that pumpkin apple upside-down cake I made for Thanksgiving, so here it is. J also made it for his co-workers the other day and they all loved it. The office resounded with the typical refrain of "I can't believe it's gluten-free!"

I've actually found it quite easy to make delicious gluten-free cakes, especially when you add great flavours like pumpkin. (I recently made a fantastic and very easy chocolate cake for a dinner party, also from La Tartine Gourmande blog. You can find the recipe here. )

Since I now turn to the Ahern's whole-grain gluten-free blend (just scroll down to find the recipe) so much, I substituted that mix in equal weight for the flours originally called for in the pumpkin cake. This time I mixed up my blend using brown rice, sorghum, millet, buckwheat and teff flours, along with a few starches.

That's the great thing about the mix - so easy! Just dump it into the bowl and weigh it. You don't even have to get out all your different flour containers. Using the whole-grain blend (which is a 70/30 mix of whole grains to starches) created an even darker, moister cake. Maybe it was the teff and buckwheat. It almost reminded me of gingerbread. Perfect for these blustery fall days. 

DSC00481

September 10, 2011

Baking with summer fruit

081

Before all the summer fruit is gone from the farmers' markets, I need to tell you about two new, gluten-free fruit desserts we got hooked on this summer.

I really love baking with fruit. It adds so much beautiful flavour and colour to baked goods, not to mention it makes desserts more healthful. And when there's so much fruit in the markets, I always feel inspired to turn some of it into an after-dinner treat.

Back in July I had a glut of overripe strawberries, and I remembered a strawberry cake I'd seen on smitten kitchen, a blog I read frequently. It's originally a Martha Stewart recipe. The cake looked simple and I decided to adapt it using my gluten-free flour mix.

It turned out wonderfully. It's a simple yellow cake base with a strong vanilla flavour, and I made it partly with whole-grain flours so it was golden and hearty. The fruit releases its juices in the oven and bleeds into the cake, so every bite tastes like summer.

084

We fell in love with this cake and made it again with cherries, then again with raspberries. It was delicious with both, but I think I like strawberries best of all. No matter what fruit you use, it should be as ripe as possible so the cake has plenty of flavour.

The second dessert is a similar concept. It was J's idea to try a clafoutis, a French cake traditionally made with cherries. It's one of the simplest desserts I've ever made. Clafoutis is almost like a cake/custard, since there's only a little bit of flour and lots of eggs and milk.

I made it with fat, luscious blackberries, and then with the traditional cherries. I preferred the blackberries since they were so juicy, but on the second go-round I baked the clafoutis less and the custard was more apparent. It almost separates into two layers, with cake on the bottom and custard on top, with fruit in every bite. This would be a great thing to fancy up by baking it in individual ramekins. It would turn something something incredibly simple into a truly elegant dessert.

061

I adapted the clafoutis recipe from our Larousse Gastronomique cookbook, and it has so few ingredients that you could also add vanilla or almond extract or lemon zest. This is literally the type of dessert you can throw in the oven in about 5 minutes while supper is cooking on the stove (you just have to toss the fruit with sugar a little bit earlier).

DSC02892

A little more about the gluten-free flour mix I mentioned earlier. There are many GF mixes on the market, and many more recipes in cookbooks. When I was first started baking with gluten-free flours, I used them all separately, and there are still recipes where I use them that way. But I also use two mixes from Gluten-free Girl. I use her all-purpose and whole grain flour mixes and so far I've had great success substituting them in many regular gluten recipes.

When substituting GF flour, it's much more accurate to use weights than cups, since all flours have different weights. That's why I started baking with a scale -- and I love it! Fewer dirty dishes and more accuracy. If you bake gluten-free it's one of the best investments you'll make, and I often use it when I cook as well, to weigh vegetables and meat. 

078

I'll be sharing more of my adapted recipes here soon. For now, whatever flours you might use, be sure to bake with summer fruit while you still can. Here in Edmonton the weather is fantastic, so let's squeeze everything possible out of the end of summer.

Gluten-free Strawberry Summer Cake
Adapted from this recipe

6 tablespoons unsalted butter or margarine, at room temperature, plus extra for pie plate
188 grams gluten-free flour (I used 88 g wholegrain mix and 100 g AP mix)
1 1/2 teaspoons baking powder
1/2 teaspoon table salt
170 grams plus 2 tablespoons (25 grams) granulated sugar
1 large egg
1/2 cup (118 ml) milk
1 teaspoon vanilla extract
1 pound (450 grams) strawberries or other summer fruit, hulled and halved

Preheat oven to 350°F. Butter a 9-inch springform or cake pan.

Whisk flour or flours, baking powder and salt together in a small bowl. In a larger bowl, beat butter and 1 cup sugar until pale and fluffy with an electric mixer, about 3 minutes. Mix in egg, milk and vanilla until just combined. Add dry mixture gradually, mixing until just smooth.

Pour into prepared pan. Arrange strawberries, cut side down, on top of batter, as closely as possible in a single layer (though I had to overlap a few to get them all in). Remember the strawberries will shrink in the oven. Sprinkle remaining 2 tablespoons sugar over berries.

Bake cake for 10 minutes then reduce oven temperature to 325°F and bake cake until golden brown and a tester comes out free of wet batter, about 50 minutes to 60 minutes. Let cool in pan on a rack.

Gluten-free Clafoutis
Adapted from the Larousse Gastronomique

500 g unpitted cherries or berries
butter for pan 
100 g sugar, divided
125 g gluten-free flour
3 eggs
1 1/4 cups milk
powdered sugar for dusting

Preheat the oven to 350°F.

If using cherries, take the stems off put do not pit them. This is the traditional way to serve it - apparently the pits add to the flavour of the cake. Wash your fruit and drain in a colander. Toss with 50 g (1/4 cup) of the sugar, and leave for at least 30 minutes so the juices can come out.

Butter your pan. I used a square 9.5 – inch dish which worked great. You could also use a 9 or 10-inch cake pan, but NOT a springform. Arrange the fruit in the pan.

Mix together the flour and the remaining sugar with a pinch of salt. Beat the eggs and add them to the dry mixture, stirring well. Add the milk and mix well until you have a smooth batter. Pour the batter over the fruit and bake for 35 to 40 minutes. You want it to be completely set and browned at the edges, but the middle should still be custardy. If you prefer, you can bake it a few minutes longer until it's browned all over and it will be more of a cake and less of a custard.

Sprinkle with powdered sugar and serve warm or at room temperature.

October 30, 2010

Pumpkin Apple Upside-down Cake


Lately I have been finding lots of inspiration over at La Tartine Gourmande


Bea has a really beautiful website. She's a professional photographer and food stylist so her photos are always gorgeous. And I really like her style of food too. Very wholesome, with a focus on fresh fruit and vegetables. Since she's from France there's often a French influence in her food as well. 


Bea definitely has a dessert and baking focus, and it turns out that much of her baking is gluten-free. As far as  I know, she doesn't have celiac disease, but she seems to really enjoy experimenting with gluten-free flours. So far, all of her gluten-free recipes I've tried have been delicious. She uses a lot of nut flours and really likes quinoa and buckwheat.

She also often incorporates fruit and vegetables in her cakes and other baked goods, which I really appreciate. Sometimes it's great to be decadent, but if I want a little treat to nibble on and pack in my lunch, I like it to be somewhat good for me as well. Which is definitely the case with this fantastic pumpkin cake


What could be more autumn-like? An incredibly moist cake with a rich pumpkin flavour and hints of quinoa and ginger with a caramelized apple top. I would love to try this as an upside-down cranberry cake as well, and it would probably be awesome with pears. It's also great just like this ... especially with a dollop of thick yogurt.


As you can see in the photo up there, I really like using my scale to weigh flours when I bake. I think it will really help me experiment more with different kinds of gluten-free flours as well. Some of Bea's recipes have weights and some don't. This pumpkin cake doesn't, so the last time I made it I figured out what they should be. If you like baking with a scale (it is a much more accurate way to measure flours, plus you don't have to get any measuring cups dirty!), here are the flour measurements for this cake:

1/2 cup quinoa flour: 2 oz.
1/2 cup brown rice flour: 2.5 oz
1/4 cup tapioca flour: 1 oz.
1/4 cup sweet rice flour: 1.25 oz

Here are a few other recipes from La Tartine Gourmande that I've enjoyed. Go peruse Bea's site yourself, I'm sure you'll love it.

Apple and Olive Oil Cake
Multi-purpose almond crumble topping
Cinnamon tea cakes

(This cake also looks amazing!)

September 29, 2010

My sister's wedding cakes


My trip to Halifax in early July was everything I hoped it would be. Fun. relaxed. Full of wedding-ness, family and cake-baking. It felt awesome to be back there. Awesome and a bit weird. It's my home, but my home is also in Charlottetown, and now sort of in Edmonton too. It makes for a strange feeling.

I ate some great food, home-cooked and out in restaurants. Of course there were places I wanted to visit that I didn't, but I have a couple of food posts in the works about the trip.

And the cakes! Oh yes, the cakes. Well. I made eight cakes, which was not as hard as it sounds. We wanted to have layer cakes so they could be filled, but the thought of baking 16 cakes instead of eight was, frankly, terrifying. So instead we baked eight, and cut each one in two so we could fill them. The final formula was orange cakes with lemon buttercream and lemon filling with sliced strawberries.

First I baked them, split them and froze them by wrapping first in plastic wrap and then in tin foil.

Then I made the buttercream and the filling. That meant a LOT of lemons. Thank God Claire has a juicer. This used to be my parents' and I love it.


Then it was time to put the cakes together. After thawing, I spent the morning before the wedding filling, crumbing and frosting in stages. Crumbing is when you put a thin layer of icing on a cake to seal in the crumbs. Then you have to chill it before frosting.

These steps actually took less time than I thought they would - I think I really got into the zone. I made sure the decorating was simple: I just piped a single border on the bottom of each cake. I don't have a lot of experience piping, but I managed to make them all look pretty good. The frosting was super fluffy and fantastic to work with.

I definitely learned a few things through this whole process. If you are baking wedding cakes, or any large-scale baking project for a special occasion, this is my advice:

1. Make sure you have all the right equipment. I couldn't have done it without my mini palette knife to spread the frosting in straight lines, the right piping tip (in my case it was the star tip), and a turntable (or a revolving cake stand) to help ice the cakes easily.

2. Plan the transport of the cakes. We bought cardboard cake plates and cardboard cake boxes at the Bulk Barn in Halifax. The cakes were 9 inches and we bought 10-inch cake plates and 12-inch boxes. Emma, one of the other bridesmaids, helped me transport the cakes from Claire's apartment to the hall where the wedding was (thanks Emma!), and even with a little sliding around in the boxes, there was no mussing of the icing.

3. Buy extra of all ingredients. It took me about half an hour to calculate what I would need to octuple (is that a word?) these recipes, and I erred on the side of caution when I was at the grocery store (although of course I forgot a few things and had to make a few extra trips later). There's nothing more annoying than running out of lemons when you're still 2 tablespoons short of lemon juice.

4. Make sure your leavening agents are fresh. To be honest, I've never really thought much about this, but it really makes a difference. We made the first cake as a test with older baking powder and it did not rise that much. When we made the others with new baking powder they rose way more.


I would recommend all three of these recipes to anyone - and not just vegans! Not only are they all delicious, but practically they really hold up too. The cake recipe freezes well and was firm enough to cut easily without any crumbly bits. Despite the hot, muggy weather in Halifax, the buttercream (made with vegetable shortening and vegan margarine) showed zero signs of melting or separating even after the cakes sat on the display table at the reception for 12 hours (and no air conditioning in the room). Impressive, I say. The orange cake and buttercream are both from the fantastic book Vegan Cupcakes Take Over the World - a solid investment if you are a vegan or if you have any vegans in your life you like to bake for. The lemon creme filling is from another vegan dessert book called Sweet Utopia.


I was very lucky to be making these for an extremely grateful and non-demanding bride and groom. It was so great to be able to do this as a gift to both of them. Since they both love food, I knew the cakes had to taste amazing (hence the four test cakes before leaving Edmonton). But they weren't very picky about appearances, which I appreciated very much. We ended up decorating the cakes with an array of fresh summer fruit - red and Rainier cherries, strawberries, and blueberries. We left the fruit whole so it wouldn't bleed onto the white icing, which meant we had to remove some of it to make the cakes easier to cut, but it was okay. The cakes were all displayed together on one table on cake stands we had borrowed from friends and family. The final effect was very pretty and summery.


I got lots of compliments on the cake from people at the reception, which felt great. I thought it was good too. Although, to be honest, I probably won't be making another citrus-flavoured cake for a long time.

After a fantastic wedding and party, Claire and Alex went to Turkey on their honeymoon. Congratulations guys!! Maybe I can bake a cake for your anniversary party in the future ...

June 30, 2010

Wedding cake: a last-minute update!

I’m flying out of Edmonton for Halifax bright and early tomorrow morning. After four test cakes, I think I’ve decided on the cake I want to make … but I’ll still need to test it before the wedding. The consensus from my testers (mostly grateful opera students in a program with J) was that the first cake I made, the orange one from the last post, was the best. So the plan right now is orange cake with lemon buttercream and a vegan lemon creme filling with sliced strawberries. The filling is made with silken tofu, and it’s delicious.

Wish me luck with the final product! We’ve also decided not to do a tiered, stacked cake but instead bake several individual layer cakes and display them all together on one table at the reception. The idea of all those dowels and huge cake pans just made me too nervous.

There are still a few details to iron out, but I think we’ll mostly decorate with fruit and some fresh flowers, plus a little piping thrown in for good measure. Buttercream won the contest against fondant, which I’m pretty happy about.

I’m hoping to update the cake results from Halifax, because when I get home I’ll be computerless for about three weeks. I’m going to take a little blogging break … not sure how long yet. I’m heading to Europe to join J in August for three weeks. I’m sure there will be lots of amazing food to blog about, but it might just have to wait until I get back in September.

So have a great summer! I’ll be enjoying Halifax, Edmonton, Vienna, Paris and Denmark … what fun!

June 17, 2010

A very important wedding cake

012

I have an announcement to make: I am baking a wedding cake!

Not just any wedding cake. The cake for my sister Claire’s wedding. The same sister who is as obsessed with food as I am. The same one who is a passionate vegan and baker extraordinaire. That sister.

There might be a wee bit of pressure involved in this project.

But the prospect of fun and excitement far outweigh any nerves I may have. I’m no professional baker, and most cakes I bake aren’t even frosted, but I want this to be the best. wedding. cake. ever. Which is partly why I’m sharing this news here.

First up, the details:

- the wedding is on July 10 in Halifax.
- the cake will have to serve about 175 guests (eep!). This means at least three tiers, possibly four.
- there is to be no chocolate involved (groom’s request) and also no nuts (just in case people have allergies). Flavours such as coconut and mocha have also been vetoed. For now, the flavour palette involves some kind of fruit, most likely citrus.
- of course, it must be vegan!

003

The fondant/buttercream debate continues. We are thinking fondant would be a neater, cleaner-looking cake (see above about not being a professional cake baker), and there is no risk of melting frosting (the reception is indoors, but you never know). The downside is it doesn’t taste so hot, and doesn’t look so natural. I’ve never worked with it and don’t remember ever eating it either.

002

So far I’ve baked one test cake – the one you see here in the photos. It was an orange cake with lemon buttercream (both recipes from Vegan Cupcakes Take Over the World – a must-have book in vegan baking circles). J took it to a party where it was a huge hit. I like it too, but I’m not convinced it’s the one. I used the buttercream to fill and frost it, but I thought that made it too sweet – this was likely also because I made the filling too thick. Ideally I’d like to have a filling different from the frosting (if we end up using frosting and not fondant).

010

There’s a lot I need to learn about construction and decorating a cake this big, and a lot of supplies to buy – dowels, cardboard cake rounds, a turntable, tinting colours, and if the frosting option prevails, palette knives and tinting colours. For preparation, I plan on baking the cake once I get to Halifax and freezing the layers. The morning of the wedding I’ll frost and fill each tier, then transport them to the venue to assemble and add final decorations. Did I mention I’m also the maid of honour? It’s going to be quite the day.

013

Tomorrow I’m going to buy a vegan desserts cookbook that looks promising, and I’m hoping it has some inspiring cake and filling recipes in it. I’m thinking of testing a lemon cake or vanilla cake next, and possibly experimenting with some kind of strawberry filling. I’m planning for several more test cakes before I head to Halifax July 1st.

So now I appeal to you, dear readers. Any advice for the first-time wedding cake baker? Fondant or buttercream? Flavours, decorating techniques, words of wisdom?? I am beyond excited about this, but a little guidance would not hurt at all.

June 4, 2010

St. Lawrence Market - Toronto

238

Visiting food markets in new cities is something I love to do when I’m traveling. Sadly I haven’t had many opportunities. I’m hoping to take in a market or two when we visit Europe this summer – so excited! I’ve heard so much about the Pike Place market in Seattle and the Ferry Building market in San Francisco. I really hope I get a chance to visit them someday. When we were in Vancouver last March I loved the Granville Island Public Market, and it immediately reminded me of the St. Lawrence Market in Toronto.

107

256

I first visited the St. Lawrence Market about a year ago, and I went back when I was in Toronto recently. It’s a pretty cool place, and just like the one on Granville Island, makes me wish we could have a market that was open during the week in Edmonton. It’s in a big old warehouse building downtown on Front street, and covers two floors. The top floor is mostly food and some kitchen-related items. When you head downstairs there is more food but also some arts and crafts mixed in.

There is so much to see.

240

Tantalizing cheese – big creamy wheels of it.

244

Lots of meat too.

105

Many varieties of shellfish.

241

Several bakeries (my mouth is watering at that Challah…).

254

Fresh Montreal bagels.

248

There’s a store on the lower level that has an astonishing array of bulk items – nuts, beans, all kinds of weird candies I’ve never heard of. They also sell different kinds of bulk salt, like Himalayan pink salt and smoked salt. It’s a great way to try new kinds of salt without paying an arm and a leg for a whole box. Last year I bought a small container of fleur de sel that’s not quite gone, and this year I bought Maldon salt. I haven’t tested them side by side yet to see if I can taste a big difference, but they’re both fantastic for sprinkling onto your food right before you eat.

262

The market also has many produce stands, both organic and non. When I was there in mid-May, they already had local berries. Jealous!

I can’t wait to discover more markets on my travels. Where are your favourite markets?